How to shape your first board...
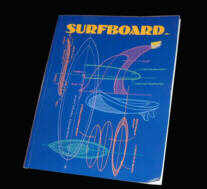
This section is just a guidline as to how I shape a surfboard, it has useful tips, as well as photographs for the first time surfboard shaper. This section should probably be used in conjunction with a book called "SURFBOARD" which is written in both English and Japanese! This book is available from most good surfshops and can probably be ordered through WH Smiths. To help, here is the ISBN number- " 0-912750-04-09 ".
This costs £15 so if dosh is tight, try and print off these pages (best to copy and paste the text into word and remeber the text is white so it won't show up until you change it to black!) and also visit the shaping link on my links page for more info on surfboard shaping. Just try and get as much information as possible from as many different sources as possible, try and visit shapers etc. Before I begin, I think I should say that making a surfboard from start to finish, is quite a time consuming and messy process using up a fair ammount of space and money. Before even setting out shaping and glassing racks, you should firstly decide whether you have enough money for all the materials. Here is an aproximate break down of the cost for all the materials of a shortboard. Obviously prices can change through time and can differ from company to company so this is only a guide:
The fibreglass cloth - 6m x Hexcel 1184 x 65 cm x 6 oz (two layers on top, one underneath) £12.30
The resin - 4kg ISO 7x Resin £30.00
The wax (added to resin to form the "Hot Coat" which will be mentioned in the glassing stage) - 125 ml Wax in Styrene (plenty) £2.55
The gloss coat - 1.2kg (aprox) Taupo Gloss £5.95
Catalyst - Free
Leash Plug - £0.99
Fins - All glass thruster set £7.95
Blank (the foam core including the stringer down the middle) .- 6`0 R £40Carrige & Packaging - £4.00
Delivery - £11.00
Therefore the subtotal is - £114.74
Vat is charged at 17.5% - £20.08
Total = £134.82
This looks expensive but buying a brand new board would cost in the region of above £300 so its a good saving and a great experience. However there is a little more you may have to spend:
Squeege (used for spreading out the resin)- It is well worth investing a fiver on one of these, make sure it is white and "non-marking".
Get 2 reels of 2" masking tape
Polish - I use "Farecla" as it is the polish a local fiberglass company use. - £15 for a tin would do about 7 or 8 boards, mabey more. Alternatives? umm, any sort of polish that is in the form of a paste (not a liquid) may do, mabey even toothpaste!!
Also I always wear disposable gloves when glassing - £10 for a box of those gloves dentists use, also you can get those thin ones from the petrol stations.
So you`ve worked out its going to cost you around £150 in total. Hey, its still quite cheap and you are getting top quality materials. Now before you go about making a shaping rack I think you need to get on with ordering the stuff as you can make the rack before it is delivered. Remember that the choice of blank is one of the most important steps of making your surfboard. I get all my materials from the same company, called "Seabase" they are based in Newquay, Cornwall and they sell the blanks (made by "Clark Foam"), all the other materials and the masking tape and the squeege. On the links page you can see the "Clarkfoam" web address and you can contact them (and Seabase) from there.
The only problem with this page is that I`ve never glassed on fins before, so I felt I can`t realy explain the procedure, however you can get the information for this on the other shaping website on my links page.
Ready to begin?
STEP ONE
Choose the blank very carefully. For my first board I copied all the dimentions off my friend`s board. Make sure that it is either the right dimentions or is a little bigger as you can take it down in size but you can`t add any on! Then get everything ordered and on its way.
STEP TWO
You can now set about making up a shaping rack. The proper shaping racks are a sort of "U" shape. This allows the board to be laid down flat and on one side. Here is a diagram of the standard shaping rack and next to it is my version.

My rack is simply two 2" by 2" lengths of wood bolted onto the underside of the top of a chest of drawers and covered in carpet underlay. The main problem with my rack is that you can`t walk round the board so you have to turn the board round when you start the other side. However any sturdy base for the board to lie on that is softly padded will be fine. Remeber the blanks are extremely delicate so there can be no sharp parts to rack.
STEP THREE.
The blank now arrives with all the other materials. Check that you have everything that you`re going to need (for example, once the catalyst was left out).
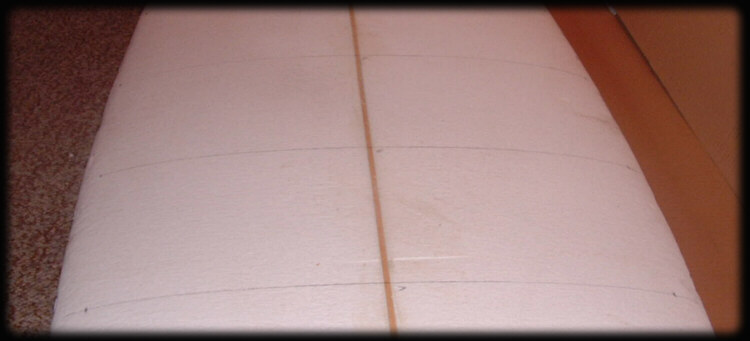
Now lay the blank down on the rack. Marking out the board correctly is very important. Firstly we mark out the planshape of the board (the veiw from above). For my first board I copied a mate`s board. To do this I "split" (as in measured) his board up into 10 equidistant sections down the length of the board taking the 90 degree distance from the stringer to the rail at each of these sections (i.e.half the width). With these measurements down on paper I then set about marking them on the topside of the blank using a soft leaded pencil. To do this I drew lines at 90 degrees to the stringer at each of the "sections" of my mate`s board. So the blank looked like this:
Then at each of the sections copy the width of the original board (you may be just able to see the dark blobs near the end of each line in the above photograph). Here comes the tricky part where two people are required. You now have to "join the dots" on the blank using a spline (long (1m) bendy ruler, or use a long thin(equal thickness throughout) piece of wood). You have to join the dots with the spline while the other person draws the line. There you have the planshape ready to cut. Remember, it is important to do this, as just rounding the rails trying to avoid shaping the blank properly will result in an non-symetrical rubbish board. Seriously, take your time to do it right. A tip for marking the nose and tail is to make cardboard "half shapes" (as in only one half of the shape), and draw round these flipping the cardboard over to make the full shape of the nose/tail. This ensures both sides are exactly the same. Now double check that the marked out planshape look right. You`ll be surprised at how sensitive your eyes are to an imperfection, so if something looks wrong double check that you`ve marked the right width.
STEP FOUR
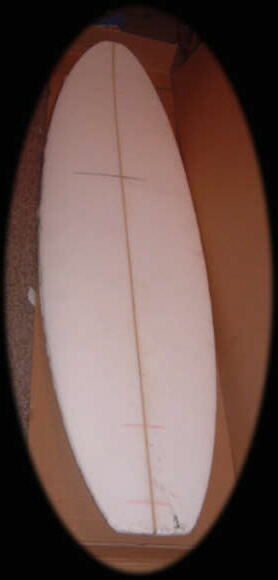
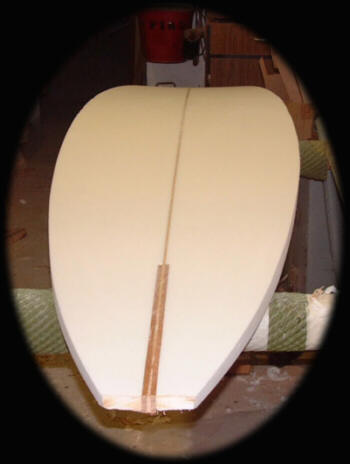
Here comes the worring part, cutting into the blank for the first time. The planshape can be cut using a number of different tools for example either a hot wrire tool, bandsaw, or pull saw. However the main objective is always the same, to cut the foam at 90 degrees to the flat bottom of the board giving a nice symetrical blank. This must be done as it makes marking out the rails much easier and more accurate. For shortboards I prefer to use the bandsaw as the flat base of the bandsaw ensures that the cut is at a right angle to the base of the board, however a lot of control is needed as one slip may cut an unwanted slot in your board! So for longer boards I use a pull saw and cut about 2 or 3 mm outside the line. If you do this you will have to sand the blank down to the line. It is very important at this stage that you make a proper sanding block. I made 2 sanding blocks, both 10cm x about 60cm, one using 150 grit sandpaper and the other using the very coarse 60 grit. If you wish to shape a concave into the board then I suggest you make one of the blocks out of thin wood, so that it can easily be bent to help shape a concave. Once you have sanded down the planshape to the marked line the board should look something like this (but without the thickened stringer at the tail):
STEP FIVE
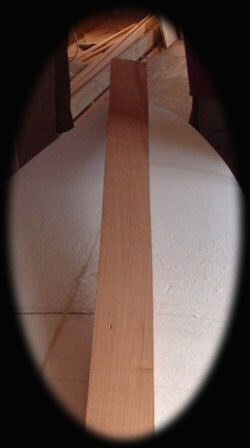
Now is the time that I either add stringers or thicken the stringer. So skip this section if you have no intentions of putting in any woodwork. On this board I only wanted to thicken the stringer at the tail so that I could incorperate my fin system. The process is just the same for adding short stringers. To start with you have to get the wood for the stringer. I use hardwood, as there is a plentiful (and free!(for me)) supply of it in my fathers workshop. However if you phone up some wood stores or prehaps even clarkfoam, you should be able to sort something out. Make sure that the depth of the wood is a little deeper than the depth of the board so that a little ammount is pretuding after it has been glued in place. Once you have the strip of wood, you must plane it to the right thickness. I use a thichnesser machine to do this, but a large hand plane would probably do. Once you have your wood ready and to the right thickness and depth, it may look like this:
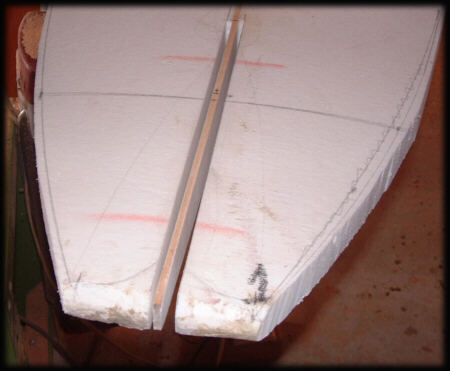
Now mark out the slots on the board that you will have cut out for the stringer. I do this with a metre rule, remeber to mark out the stots carefully. Now cut the stots. I think it is very important that the slots are cut at 90 degrees to the bottom of the board, so I don`t use a pull saw for this part, I always use the bandsaw. Once both slots have been cut the tail should look like this:
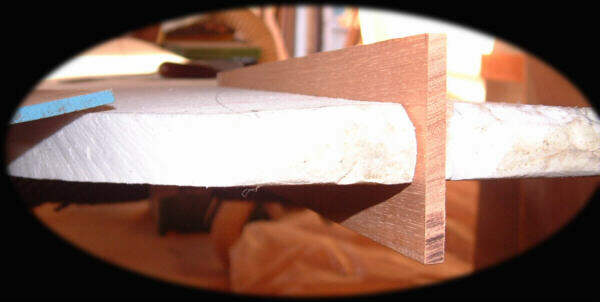
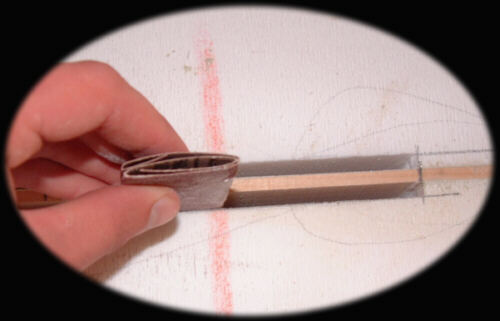
Now you have to cut the strip of wood into the right lengths, and try press-fitting one in a slot:
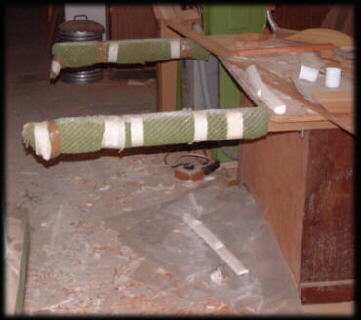
I very much doubt if it will fit fit, so you have to carefully make the slot wider by folding up a piece of sandpaper (to add a bit of strength to it) and sanding along one side of the slot. This is arm aching and tedious so try and cut the slot carefully first time. Below is a photograph of the slot being sanded wider:
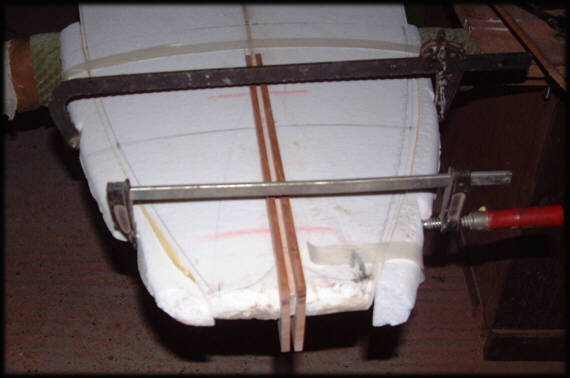
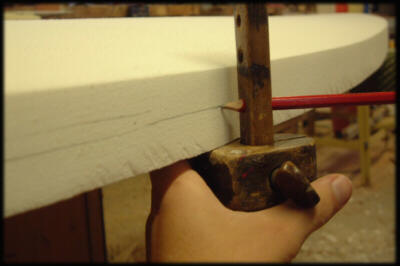
Repeat the press-fit procedure for the other slot until both the pieces of wood slide in, and are quite snug, so that they won`t fall out of the slots. Now you have to prepare the board for the glue job. I always spend a lot of time on this, as a poorly prepared glue job can result in a panic (as the glue is setting) and a mess of resin drips everywhere. Right, the first thing you have to do is mask off the board very close to the area you are about to glue (I mask right to the edge of the slot) you must now be aware that any glue that sets on the board can only be chipped of resuting in a dent in the blank, that is why I glue the stringer thickener in before shaping the board. Once you have masked off the area, place the pieces of wood in the slots and clamp the board, as if it were the real glue job. To clamp it I use long clamps and the offcuts of foam to protect the board (see picture below-however see the next photo for the masking arrangement).
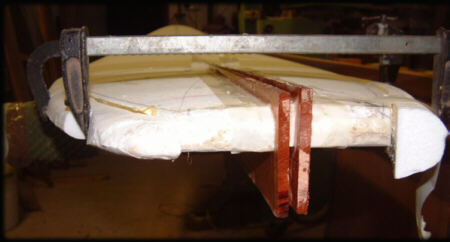
When you are happy with the moch up, you are ready to glue. So get gloves on, and I use epoxy resin for this as my father has loads. However you could use the normal surfboard resin (polyester). Mix up the resin and with a thin flat stick spread it on both the wood pieces and on the inside of the foam slots. Slide the wood pieces all the way into the slots and put on the clamps and tighten till glue comes out of the slot sides. You should really wipe the this excess resin off with either the stick or a cloth. Whilst the board is drying it should look something like this:
When the resin is really tacky, but not quite set, peel off the masking tape.
STEP SIX
Now the fun begins, with a hand plane shape the wooden stinger thickener pieces down till they are are flush with the foam. Now you have to remove the layer or crust that is all over the board. To do this I use a hand-plane on a rough setting. Once you have removed the crust on both sides of the blank, set your plane to a finer cut and continue shaping the board. Remember to keep your cuts quiet long and gentle. When you are happy with the deck and bottom shape you can now use a sanding block to get a better finish. I use a long (60cm by about 15cm and around 1cm thick) piece of wood with sand paper glued flat to it. Use it in a long sweeping motion so lumps or dips don't occur. Once you are happy with the deck shape you are now (and only now) ready to start on the rails.
STEP SEVEN
Shaping the rails; like in other stages of the shaping, proper marking out is essential. For this I use a marking gauge, but a pair or compasses will do the job. The most important thing here is to ensure both sides are the same. So whatever markings you make on one side, you must do the same to the other. Explaining how I mark out would be a difficult task, however I make a series of lines that I shape down to. Below is a photograph to show my lines, remeber the front of the board would typically have what are called 50/50 rails where the marking line would be half-way up the rail. At the centre it could possibly be 70/30 or "rolled" where the marking line would be drawn 70% from the top, 30% from the bottom. And for the last 1/3rd of the board length you normally have, "hard", "knife edge" rail edges where the rail is 100/0 so the deck is shaped right down to the bottom. If you are unsure just look at any board lying around and you should soon see what I mean. Below is a photograph to show typical markings I make on the rails.
Once you are happy with the marking, start the cutting with a saw (if there is a lot of waste that needs be got rid of) or a plane (if there isn`t so much). Just never do a whole rail, alternate between the two rails, doing the same parts on both (e.g. do the front on both then move to middle). Often take steps back, look down the length of the board and compare the two rails. The eye is extremely sensitive and if something doesn`t look quite right then it won`t look right on the final product! So always take time to get it right. The tool I use most for shaping the rails is the sanding block (the same one as described in step six). Again use it in long flowing strokes to avoid lumps or hollows. Just keep checking really, once you have finished the rails, step back, and see what needs improving. Finally sand the tops and bottom to get rid of anyany rough patches in the foam, then fine sand the board (150 grit), and the board is ready to paint:

I can`t think of anything I have missed out. However use this in conjunction with other material (preferably the book "surfboard" (mentioned above)).
If you have any problems during the shaping email me, or any other shaper really, nearlly all of the shapers I asked were really keen to help.
Good luck, and the painting section should be here after my first term in Uni. (i.e. Christmas 2002)